Introduction
Feel awful to wait in front of your PC for recording? Take it easily! Just to create your schedule task with a built-in recording timer provided by Webcam/Screen Video Capture Free. This tool helps set up a schedule to start/stop the recording activities or create a new recording automatically after a certain period. As long as you preset your task, just leave the rest to Webcam/Screen Video Capture Free, without the need for supervision. Download Webcam/Screen Video Capture Free to schedule recording.
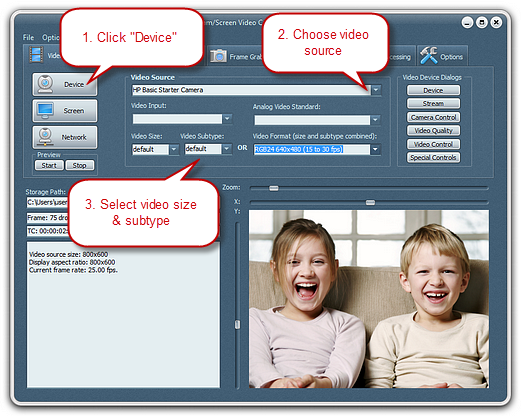
Step 1. Choose Recording Video Source & Set the Output Video
Choose the video source and specify its related settings.

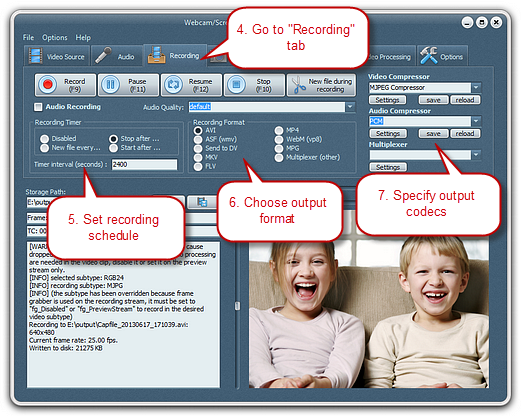
Step 2. Set Schedule & Start Recording
Click “Recording” tab. Check “Stop after/Start after” to set a recording timer to automatically stop/start recording after a certain period of time (counted in seconds). Check “New file every…” if you want to record multiple video clips in every desired time interval. Just enter the number of seconds in“Timer interval” field to adjust the time according to your need. To turn off the recording timer, check “Disabled”.

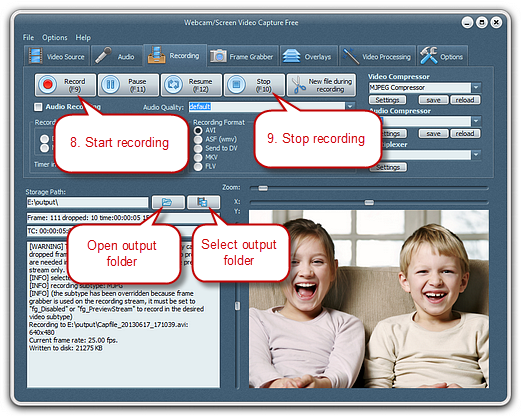
You can select output folder or directly open it after recording. When everything is ready, click “Record” or press F9 to start recording. You can also pause, resume, and stop the recording.

