Introduction
The image overlay function helps add overlay image like your own company logo, watermark and so on to make your recordings and learning content look unique, more importantly, to protect them from unauthorized use. User can define the position, size, transparency, and Chroma key for special needs. Download Webcam/Screen Video Capture Free to save your recordings from plagiarism!
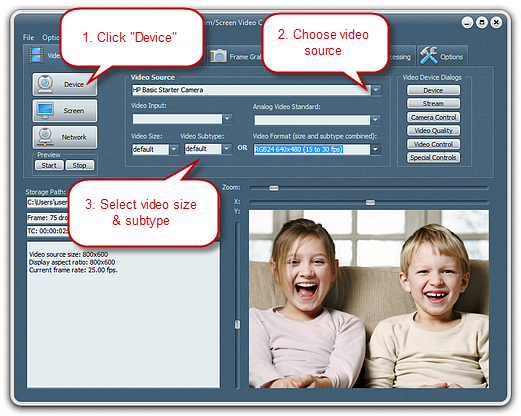
Step 1. Choose Recording Video Source & Set the Output Video
Choose the video source and specify its related settings.

Step 2. Add Image Overlay
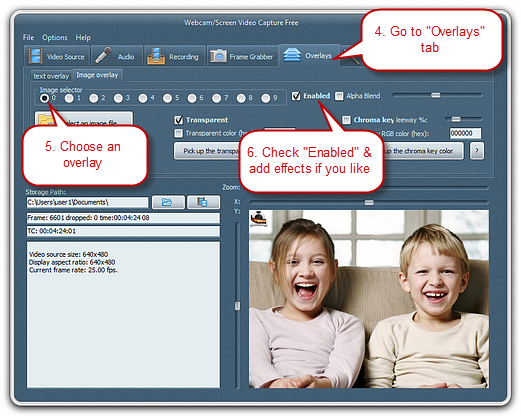
Click “Overlays” tab. Choose an overlay (0 to 9) to add to the recording. You can add multiple overlays to one recording (10 overlays at most) and there is a sequence number for each overlay. Check “Enabled” and you’ll see the overlay display from the previewer. Click “Select an image file…” to choose a picture from your computer. Enter the values of Left, Top, Width and Height to control its position.
Check “Transparent” if you want to add this effect to the overlay. Enable “Alpha Blend” and move its slider bar to adjust the effect. You can set the transparent color.
While the preview is running:
– load the image overlay
– enable “transparent” and “use transp.color value”
– in the video window, click on the video frame on the color of the overlayed image you want to be transparent
– click “Pick up the transparent color” to select it as transparent color.
If you like, you can enable chroma key and adjust the leeway percent (default 25%) by dragging its slider bar. You can set the chroma key color as you pick up the transparent color.

Step 3. Specify Recording Settings & Start Recording
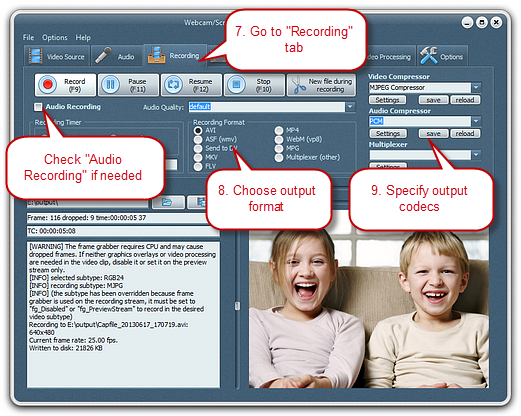
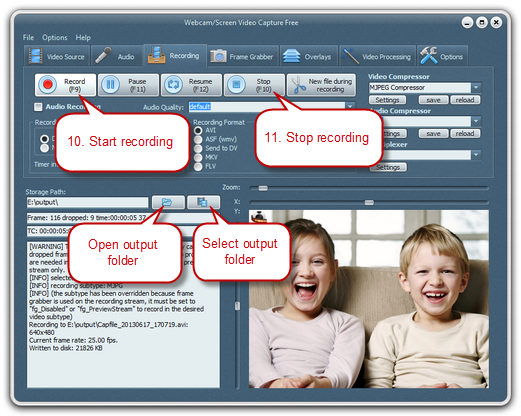
Click “Recording” tab. If you want to record video with audio, check “Audio Recording” and choose the audio quality from its dropdown list. The recording format and codecs can also be easily chose and set.


